

HOW TO PREPARE YOUR FREE 30-DAY TRIAL / INSTALLATION
Use Windows to prepare bootable USB flash drive
Download the Euphony 4.0 disk image by selecting this link. (for Euphony 3.0 image please look below).
Download Rufus app to create a bootable USB drive.
Use a 16 GB or larger USB flash drive. Insert it into your Windows computer.
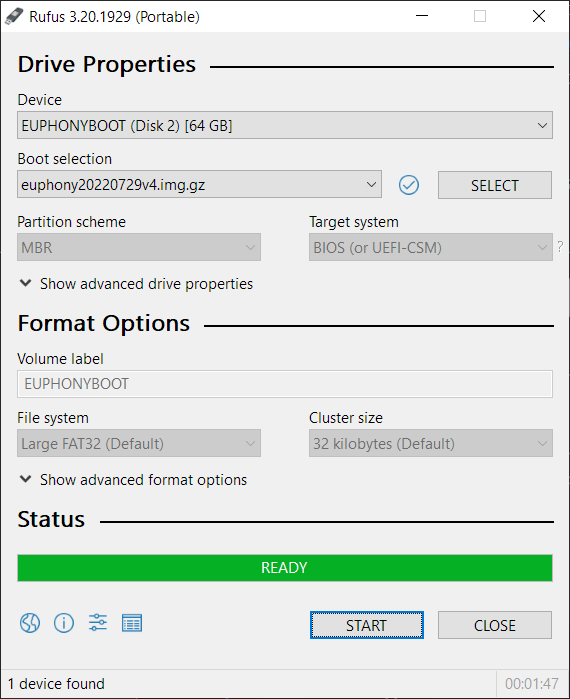
Start Rufus. There are only two parameters to choose in Rufus to create a bootable Stylus 4.0 USB drive:
- Select your USB flash disk, you inserted into computer.
- Select the downloaded image (file like: “euphony 202xxxxxv4.img.gz”) and click OPEN.
- Press START and Rufus will start writing the image to your USB drive.
- Please note that all data on your USB drive will be deleted (forever).
After finishing with Rufus, your USB flash disk is ready to be inserted into your new music server. Before booting connect your new server to a local home network (LAN).
Plug in your USB flash disk into the USB port of your music server. Before powering on, make sure boot priority is set to boot from USB disk you prepared. Priority can be set by selecting F2 key immediately after you turn on your computer. This enables you to enter the bios settings (some computers may use other F keys to enter the boot only menu).
When you entered bios setting, find boot priority menu and select your newly created USB disk as the first boot device. After setting this, you need to restart computer. This will start Euphony Stylus from USB flash.
After restarting, you do not need any more monitor and keyboard attached to your music server. This means form now on, you will control your new music server only via remote computer/tablet/smartphone connected to the same home network as your new Euphony music server / computer.
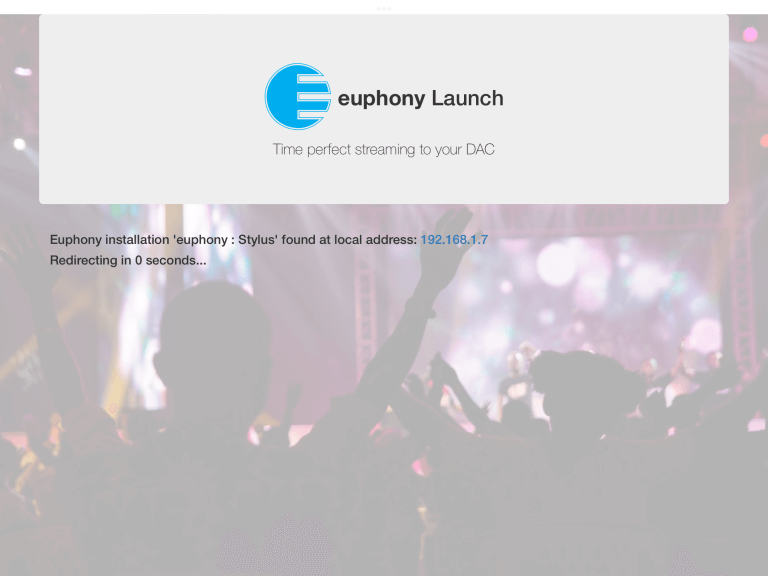
You can use a “web Internet browser” on remote computer to find Euphony WEB control interface. To find it simply go to https://euphony-audio.com/v4/launch-stylus/.

Alternatively you can download our “Euphony Stylus” IOS app or Android app to control the Stylus remotely. (In corresponding IOS and Android app. store seek for “Euphony Stylus”).
To continue using or installing Euphony Stylus to internal HDD you need to register your installation.
Register Euphony with your voucher code (received in the email) or enter “TRIAL” to start your 30-day trial period.
Detailed Registration process is explained below.
Use MAC (OSX) to prepare bootable USB flash drive
NOTICE: This part of instructions pertain to generating Euphony USB boot image on a MAC computer. It does not assume what is the target machine for booting Euphony. If you target machine is also MAC please note that Euphony may not boot on some MAC computers. This is a known issue and the exact cause is still in the process of being determined. If you encounter problems booting from MAC contact us and help resolve this issue.
- Download Euphony image file.
- When image is downloaded it should be (automatically) unpacked to a file with ‘.img’ extension. If Euphony image file remains with compressed ‘.img.gz’ extension, use appropriate MAC OSX program to decompress file to ‘.img’
- Download and install OSX program Etcher
- Use Etcher to burn downloaded Euphony image on USB stick (min. 16GB). Newer versions of Etcher should also work with Euphony image file even if it remains in compressed form – ‘.img.gz’. Please remember to clear/format (old) USB sticks to be format MS-DOS (FAT32) so Etcher program can use it. Clearing can be done with OSX Disk utility.
- Insert the USB stick into your MAC (with INTEL CPU, M1 or new are not supproted) and power it on. (‘Legacy boot’ and ‘UEFI boot’ are both supported.) Hold OPT key when powering up MAC to access boot menu. USB stick will be shown as Windows disk. Choose it and wait until Euphony boots up.
- After the boot process is finished (first boot is longer, wait at least 4-7 minutes), Euphony system is available at the address: http://euphony.local
- Register Euphony and enter “TRIAL” instead of a voucher code.
Use Linux to prepare bootable USB flash drive
- Download Euphony image file.
- Attach USB stick (min. 16GB), open Linux shell and enter:
gunzip -c euphonyXXXXXXXX.img.gz | sudo dd of=/dev/sdb
If your USB stick is not on /dev/sdb, change accordingly (check with:lsblk -f). - Insert the USB stick into your target machine and power it on (Make sure USB has boot priority. If not, enter BIOS boot menu and select USB as the boot device. (‘Legacy boot’ and ‘UEFI boot’ are both supported.).
- After the boot process is finished (first boot is longer, wait at least 4-7 minutes), Euphony system is available at the address: http://euphony.local
- Register Euphony and enter “TRIAL” instead of a voucher code.
Registration process flow
The registration process requires a little back-and-forth between Euphony application, your email and online Euphony Registration site.
- Select ‘Registration’ from the Main Menu: Registration dialog appears.
(continue here for “TRIAL” registration)
- Enter your name, email address and type “TRIAL” for voucher code.
- After you clicked ‘Register’ you should be get message on bottom of Registration dialog: “Thank you for registering! – Please check your email: [your@email.com] and confirm your email address.”.
- An email should arrive on email address you provided.
- Click on “Verify email” button link inside email.
- The Browser page on Euphony registration site should appear with message: “Thank you for registering and confirming your email! – You can check your registration in Euphony app!”. This message confirms that TRIAL registration is complete.
- When you return to your Euphony app, you will see registration is accepted and on bottom right corner you will see TRIAL (xx days left – “name”). You can use your TRIAL installation for indicated number of days.
(continue here for LICENSE registration)
- You successfully bought a license and received confirmation email with voucher code (license activation code) and invoice.
- Select ‘Registration’ from the Main Menu. Registration dialog appears.
- Enter your name, email address “actual voucher code” you received in email after buying Euphony license.
- After you clicked ‘Register’ you should be get message on bottom of Registration dialog: “Thank you for registering! – Please check your email: [your@email.com] and confirm your email address.”
- You should check your email, and confirm it by clicking on “Verify email” button inside email.
- After confirmation of your email address, your license should be active and registered.
- When you return to Euphony app, you will see on right bottom corner information: “(R) xx days left – [license owner]). Number indicates active subscription period. This should be automatically renewed when our payment processor charges you for next subscription period.
Euphony Stylus 4 Guide (user manual)
For using Euphony and Stylus 4.0 download EUPHONY GUIDE v4 document.
Written offer for GPL and LGPL source code
Where such specific license terms entitle you to the source code of such software, AUDIOKERNEL will provide upon written request via traditional paper mail the applicable requested portions of GPL and LGPL source code files at nominal cost to cover shipping and media charges as allowed under the GPL and LGPL.
Please direct all inquiries via Mail to:
contact@audiokernel.com
Your request should include:
– the name of the covered binary
– the version number of the product containing the covered binary
– your name
– your company name (if applicable)
– your return mailing and email address (if available)
This offer is valid to anyone in receipt of this information.
Download Euphony 3
Download: Euphony Stylus 3 image
After download please use same installation procedure as for Stylus 4 (explained at beginning of this page).
Stylus 3 image is given for purpose to renew old installation, only on hardware where it was previously installed.